Microgreens have captured the attention of both culinary enthusiasts and urban gardeners due to their nutritional benefits and ease of cultivation. As someone new to this exciting world, understanding the foundational element of microgreens—the seeds—is crucial for successful cultivation. This guide serves as a comprehensive introduction, aimed at demystifying the world of microgreen seeds for beginners.
What Are Microgreen Seeds?
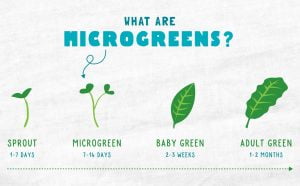
 Microgreen seeds are not a specific variety of seeds but rather a term used to describe the seeds of various vegetables, herbs, and edible plants when they are used to grow microgreens. Microgreens are the young seedlings of these plants, harvested just after the first true leaves have developed. This stage is typically reached within 1-3 weeks after germination, depending on the plant species.
The beauty of microgreen seeds lies in their diversity. They can range from common vegetables like radish, broccoli, and lettuce to more exotic varieties like amaranth or mustard. Each seed variety brings its unique flavor, texture, and color to the microgreens, allowing for a vast array of culinary uses.
Importance of Seed Selection in Microgreen Cultivation
The key to a successful microgreen garden starts with the right seed selection. Here are some reasons why choosing the appropriate seeds is vital:
- Safety and Quality: It’s imperative to use seeds that are intended for microgreen or sprout cultivation. These seeds are often tested for pathogens to ensure they are safe for consumption at the young stage. Additionally, high-quality seeds have better germination rates, ensuring a more uniform and abundant crop.
- Variety Specificity: Different seeds require different growing conditions and care. Understanding the specific needs of each variety, such as light, water, and temperature, can significantly impact the success of your microgreen cultivation.
- Flavor and Nutritional Profile: Different seeds offer different flavors and nutritional benefits. For example, radish microgreens are known for their spicy kick, while pea shoots offer a sweet, delicate flavor. Nutritionally, microgreens are packed with vitamins, minerals, and antioxidants, often in higher concentrations than found in mature plants.
- Growth Cycle Management: Different seeds have different growth cycles. While some seeds, like arugula, can be harvested in as little as a week, others, like beets, may take longer. Understanding these cycles is crucial for planning and maintaining a continuous supply of fresh microgreens.
For beginners, starting with easy-to-grow varieties like radish, broccoli, or kale can be a great way to get familiar with the process. As you gain experience, you can experiment with more varieties and refine your cultivation techniques.
In the next sections, we’ll delve deeper into choosing the right seeds, preparing them for planting, and managing their growth to ensure a successful and rewarding microgreen cultivation experience. Stay tuned as we explore the exciting world of microgreen seeds!
Choosing the Right Seeds
The journey of growing microgreens begins with selecting the appropriate seeds. This step is crucial in determining the ease of cultivation, the quality of the microgreens, and their eventual use in your kitchen or market. Let’s explore the characteristics of ideal microgreen seeds, popular varieties, and whether regular seeds can be used for this purpose.
Characteristics of Ideal Microgreen Seeds
- High Germination Rate: Look for seeds that have a high germination rate, meaning a high percentage of the seeds will sprout. This ensures a dense, uniform growth of microgreens.
- Purity and Safety: Choose seeds that are specifically labeled for growing microgreens or sprouts. These seeds are often tested to be free from harmful pathogens like E. coli or Salmonella, making them safe for consumption when harvested young.
- Organic and Non-GMO: Many growers prefer organic and non-genetically modified (non-GMO) seeds, as they are grown without synthetic pesticides and fertilizers, aligning with natural and sustainable farming practices.
- Variety and Flavor: Ideal microgreen seeds offer a variety of flavors, colors, and textures. This diversity can enhance your culinary creations or appeal to a wide range of customers if you are growing commercially.
Popular Varieties of Seeds for Microgreens
- Radish: Known for their quick germination and spicy flavor, radish microgreens are a favorite for beginners and experts alike.
- Broccoli: These microgreens are not only easy to grow but are also renowned for their health benefits, including high levels of sulforaphane.
- Peas: Pea shoots are sweet and tender, perfect for salads and garnishes. They require a bit more space but are very rewarding to grow.
- Sunflower: With a nutty flavor and crunchy texture, sunflower microgreens are a popular choice for both taste and nutrition.
- Arugula: For a peppery flavor, arugula microgreens are an excellent choice. They grow quickly and add a unique taste to dishes.
- Mustard: If you’re looking for a spicy kick, mustard microgreens are an ideal choice. They add both flavor and a vibrant green color to any dish.
Can Regular Seeds Be Used for Microgreens?
While it’s technically possible to use regular seeds for growing microgreens, it’s not always recommended. Here’s why:
- Safety Concerns: Regular seeds may not be tested for pathogens, making them a potential health risk when consumed as microgreens.
- Treatment with Chemicals: Some regular seeds are treated with fungicides or other chemicals, which are not intended for crops harvested at the microgreen stage.
- Variable Germination Rates: Regular seeds might have lower or uneven germination rates compared to those specifically sold for microgreen cultivation.
- Unknown Growth Characteristics: Seeds not specifically sold for microgreens might not have well-documented growth patterns, making it challenging for beginners to manage their cultivation.
In conclusion, while starting with regular seeds is an option, using seeds specifically labeled for microgreen cultivation is the safest and most reliable choice. These seeds will give you the best start in your microgreen growing journey, ensuring a safe, healthy, and plentiful harvest. In the next section, we will delve into the preparation and planting of these seeds, setting the foundation for a thriving microgreen garden.
Understanding Seed Quality
As you delve deeper into the world of microgreen cultivation, it’s important to understand the factors that influence the quality and price of the seeds. This understanding will guide you in making informed decisions about purchasing and using microgreen seeds.
Why Are Microgreen Seeds Expensive?
- High Germination Rate: Microgreen seeds are often more expensive because they are selected for their high germination rate. This ensures a dense and even crop, which is particularly important in commercial microgreen farming.
- Pathogen Testing: Seeds specifically for microgreens undergo rigorous testing for harmful pathogens like E. coli and Salmonella. This testing ensures the safety of the microgreens for consumption, especially since they are often eaten raw.
- Specialized Breeding and Selection: Some microgreen seeds come from plants that have been specially bred for characteristics like flavor, color, and growth rate. This selective breeding process can add to the cost of the seeds.
- Packaging and Labeling: Microgreen seeds are typically packaged in smaller quantities with detailed labeling about their specific growing needs and characteristics. This specialized packaging can also contribute to the higher cost.
Organic vs. Non-Organic Microgreen Seeds
The choice between organic and non-organic microgreen seeds is significant for both personal and commercial growers:
- Organic Seeds: These are produced without the use of synthetic pesticides and fertilizers. They are often preferred by those following sustainable and eco-friendly practices. Organic seeds can sometimes be more expensive due to the more labor-intensive organic farming methods.
- Non-Organic Seeds: These may be produced with the help of synthetic chemicals. They are usually less expensive and can offer a wider variety of options. However, for those concerned about chemical residues and sustainable practices, non-organic seeds might not be the preferred choice.
The Significance of Non-Treated and Non-GMO Seeds
- Non-Treated Seeds: Non-treated seeds are free from chemical fungicides and pesticides. This is particularly important for microgreens since they are harvested at a young stage where they could still harbor residues from such treatments.
- Non-GMO Seeds: Non-GMO (Genetically Modified Organism) seeds are preferred by many due to concerns about the long-term impacts of GMOs on health and the environment. While GMO seeds are often engineered for certain beneficial traits, the preference for non-GMO seeds is largely driven by the desire for natural, unaltered plant genetics.
In summary, understanding the quality of microgreen seeds is crucial. The price of seeds is often reflective of their quality, safety, and the care taken in their production and packaging. Whether you choose organic or non-organic, non-treated, or non-GMO seeds, your choice will impact not only the quality of your microgreens but also align with your personal or commercial cultivation values. The next chapter will guide you through preparing and planting these seeds, setting the stage for a successful microgreen garden.
Seed Preparation and Planting: A Beginner’s Guide to Microgreen Cultivation
Embarking on the journey of growing microgreens begins with two critical steps: preparing the seeds for planting and mastering the sowing techniques. This guide is designed to walk beginners through these initial stages, ensuring a solid foundation for successful microgreen cultivation.
Preparing Seeds for Planting: The Role of Soaking
The preparation of seeds is a pivotal first step in the microgreen growing process, with soaking playing a central role for certain types of seeds.
- Why Soak Seeds?: Soaking helps to break down the natural defenses of the seed, such as the hard outer shell, allowing for quicker and more uniform water absorption. This is especially important for larger seeds, like peas or sunflower, which have tougher outer coats.
- Soaking Process: To soak the seeds, immerse them in room-temperature water. The duration of soaking varies – while some seeds may need just a few hours, others might require an overnight soak. After soaking, it’s crucial to drain and rinse the seeds thoroughly. This step prevents mold growth and prepares the seeds for sowing.
- Seeds That Don’t Require Soaking: Not all microgreen seeds need soaking. Small seeds, such as broccoli, arugula, or radish, are typically sown dry as they are small enough to germinate quickly without pre-soaking.
Sowing Techniques: Seed Density and Distribution
Effective sowing is key to achieving a uniform and healthy growth of microgreens.
- Understanding Seed Density: Seed density refers to how many seeds are sown in a given area. This varies depending on the seed size and the desired thickness of the microgreen mat. Generally, smaller seeds are sown more densely than larger ones. However, overcrowding should be avoided as it can lead to issues like poor air circulation and mold growth.
- Even Distribution: Achieving an even distribution of seeds across your growing medium is essential. For small seeds, using a shaker or a spreader helps in evenly distributing them. Larger seeds can be spread by hand. Ensure that seeds are not clumped together, as this can lead to uneven growth.
- Choosing the Right Medium: Microgreens can be grown on various mediums, including soil, coconut coir, or hydroponic growing mats. Regardless of the medium, it should be flat, even, and pre-moistened to provide the seeds with adequate moisture and support for germination.
Germination: Factors Influencing Seed Sprouting
Several factors play a role in the successful germination of microgreen seeds:
- Moisture: Consistent moisture is critical for germination. The growing medium should be kept moist but not waterlogged. A spray bottle is often used to gently water the surface without disturbing the seeds.
- Temperature: Most seeds germinate effectively at room temperature, typically between 65-75°F (18-24°C). Extreme temperatures can inhibit germination.
- Lighting: During germination, seeds do not require light. Covering the seeds with a lid or a blackout dome can help maintain consistent moisture levels and warmth.
- Air Circulation: Once seeds have sprouted, it’s important to remove any covers to provide good air circulation. This is crucial to prevent mold and ensure healthy growth.
By understanding and implementing these foundational steps of seed preparation and sowing techniques, beginners can effectively start their journey into microgreen cultivation. Each type of seed might have its specific needs, but these general guidelines will help you set up for a successful and bountiful harvest of these nutritious and flavorful greens.
Growth and Harvest of Microgreens: A Comprehensive Guide
Growing microgreens is a rewarding process that requires attention to detail, especially during the growth and harvest stages. This guide aims to provide beginners with the essential knowledge needed to successfully grow and harvest microgreens.
Growth Cycle of Microgreen Seeds
Understanding the growth cycle of microgreen seeds is crucial for timing the harvest correctly and ensuring the best quality of your microgreens.
- Germination Stage: This initial stage begins right after sowing the seeds. Microgreen seeds usually germinate within a few days, depending on the variety. During this period, the seeds require consistent moisture and warmth but not direct light.
- Seedling Stage: Following germination, the seedlings start to develop their first leaves, known as cotyledons. This stage is crucial as the plants begin to photosynthesize and grow upward.
- True Leaf Stage: After the cotyledons, the microgreens will start developing their first true leaves. This stage typically signifies that the microgreens are ready to be harvested. The exact timing can vary from one to three weeks after sowing, depending on the seed type.
- Full Growth: If microgreens are not harvested after their true leaf stage, they will continue to grow into their mature plant forms. However, the tender texture and concentrated flavors are best when harvested at the microgreen stage.
Harvesting Microgreens: Timing and Techniques
Harvesting microgreens at the right time and with the right technique is crucial for maximizing both yield and quality.
- Optimal Harvest Time: The best time to harvest most microgreens is when they have developed their first true leaves, which is typically 1-3 weeks after sowing. They should be about 1-3 inches tall.
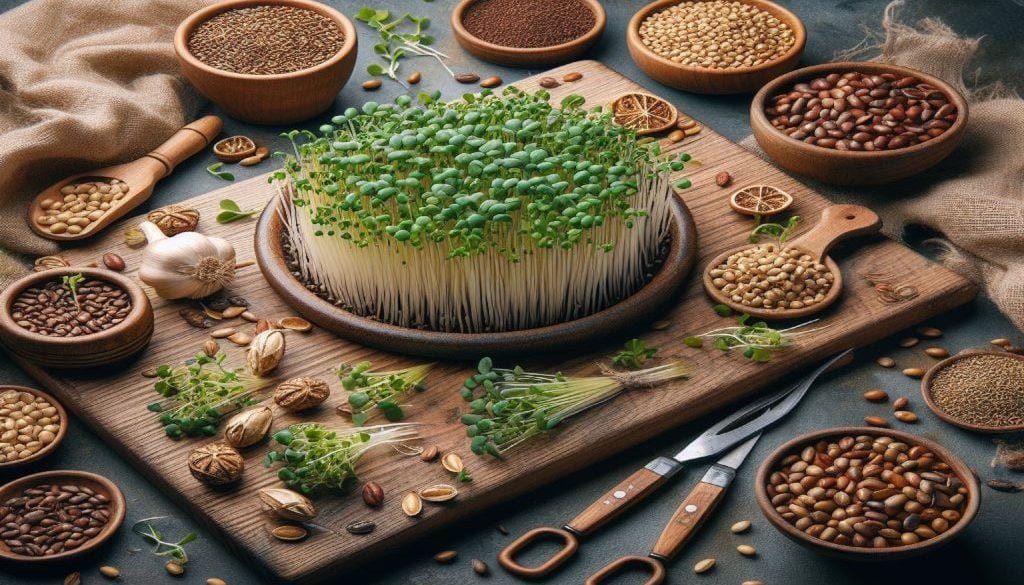
- Harvesting Method: Use a clean, sharp pair of scissors or a knife to cut the microgreens just above the soil line. It’s important to harvest gently to avoid bruising or damaging the delicate plants.
- Washing and Storage: After harvesting, microgreens should be washed gently to remove any soil. They are best used immediately but can be stored for a short time in the refrigerator. Keep them in an airtight container lined with a paper towel to absorb excess moisture.
Do Microgreens Regrow After Cutting?
- Generally, microgreens do not regrow after harvesting. They are grown as a one-time crop, and once cut, their growth cycle is complete.
- Some exceptions, like pea shoots, may regrow a second crop, but the quality and yield are often not as high as the first.
Understanding the growth cycle and mastering the harvesting technique are key components to successful microgreen cultivation. With proper care and attention, beginners can enjoy a continuous supply of fresh, nutritious, and flavorful microgreens from their own garden.
Troubleshooting Common Issues in Microgreen Cultivation
Growing microgreens can be a straightforward process, but like any form of gardening, it comes with its own set of challenges. This section addresses common issues that beginners might face when growing microgreens from seeds and provides practical solutions to overcome them.
Challenges in Growing Microgreens from Seeds
- Poor Germination: One of the most common issues is seeds not sprouting or having a very low germination rate. This can be due to various factors including old seeds, incorrect moisture levels, improper temperature, or inadequate soil conditions.
- Mold and Fungal Growth: Mold or fungal growth is often a result of too much moisture or poor air circulation around the growing microgreens. It not only looks unsightly but can also be harmful if consumed.
- Uneven Growth: Sometimes microgreens grow unevenly, leading to a patchy harvest. This can be caused by uneven seed distribution, inconsistent lighting, or variable moisture levels.
- Pest Infestation: Though less common in indoor settings, pests like aphids or fungus gnats can sometimes infest microgreen crops, especially if the growing area is not kept clean or if plants are overwatered.
How to Overcome Poor Germination and Other Seed-Related Issues
- Ensuring Seed Quality: Always use high-quality, fresh seeds. Check the expiration date and source your seeds from reputable suppliers. Avoid using old seeds as they have a significantly lower germination rate.
- Optimizing Growing Conditions: Maintain an ideal temperature range (usually between 65-75°F or 18-24°C) and ensure the growing medium is consistently moist but not waterlogged. Use a spray bottle to gently water the seeds.
- Preventing Mold and Fungal Issues: Improve air circulation around your microgreens by not overcrowding the seeds and using a fan if necessary. Ensure the growing medium is damp but not excessively wet. Consider using a mild organic fungicide if mold is a persistent issue.
- Achieving Even Growth: Distribute seeds evenly when sowing and ensure they receive uniform light. Rotate the growing tray if necessary to expose all sides to equal amounts of light.
- Dealing with Pests: Keep your growing area clean and free of debris. If pests are detected, use organic pest control methods such as neem oil or introduce beneficial insects like ladybugs for natural pest control.
- Adjusting Watering Techniques: If overwatering is a problem, consider using a bottom-watering system where water is added to a tray beneath the growing medium. This encourages roots to grow downward and helps prevent overwatering.
By understanding and addressing these common issues, beginners can significantly improve their success rate in growing microgreens. Remember, troubleshooting is a natural part of gardening, and each challenge presents an opportunity to learn and become a more skilled grower.
Storing and Preserving Seeds for Microgreen Cultivation
Proper storage and preservation of microgreen seeds are crucial for maintaining their viability and ensuring successful future growths. This guide provides best practices for storing microgreen seeds and information on their shelf life, helping beginners and experienced growers alike to maximize their seed investments.
Best Practices for Storing Microgreen Seeds
- Cool and Dry Conditions: The most important factor in storing seeds is to keep them in a cool and dry environment. High humidity and temperature can trigger germination or lead to the deterioration of the seeds. A common practice is to store seeds in airtight containers or sealed bags in a cool, dry place like a pantry or a cupboard.
- Avoiding Light Exposure: Direct sunlight or constant exposure to light can degrade the quality of the seeds. Store seeds in opaque containers or a dark location to protect them from light.
- Proper Labeling: Label each container or bag with the seed type and the date of purchase or packaging. This helps in tracking the age of the seeds and in planning their usage accordingly.
- Use of Desiccants: To control moisture, consider placing a desiccant, like silica gel packets, in the storage container with the seeds. This is particularly helpful in humid environments.
- Refrigeration: For long-term storage, seeds can be refrigerated. Ensure the seeds are in an airtight container to prevent moisture from entering. Some growers even freeze seeds for extended preservation, though this might not be suitable for all seed types.
Shelf Life and Viability of Microgreen Seeds
- General Shelf Life: Microgreen seeds, like most seeds, have a shelf life beyond which their germination rate starts to decline. The average shelf life ranges from 1 to 5 years, depending on the seed type. However, with ideal storage conditions, some seeds can remain viable even longer.
- Factors Affecting Viability: The shelf life of seeds is influenced by factors such as the seed type, the initial quality of the seeds, and the storage conditions. Seeds stored in a cool, dry, and dark environment will retain their viability longer than those stored in fluctuating or suboptimal conditions.
- Testing for Viability: If you are unsure about the viability of your seeds, you can perform a germination test. Place a few seeds on a moist paper towel, keep them in a warm place, and check for germination after a few days. This will give you an indication of the germination rate you can expect.
By following these best practices for storing and preserving microgreen seeds, growers can ensure that their seeds remain viable for as long as possible, reducing waste and increasing the success rate of their microgreen cultivation endeavors. Remember, the care you put into storing your seeds will reflect in the quality and yield of your microgreen crops.
Embracing the World of Microgreen Cultivation
As we conclude this guide on microgreen cultivation, it’s important to recap the key takeaways and offer some encouragement to beginners who are about to embark on this rewarding journey.
Recap of Key Takeaways
- Seed Selection and Preparation: Choosing the right microgreen seeds is crucial. Opt for high-quality, disease-free seeds suited for microgreen cultivation. Remember the importance of soaking certain seeds and the best practices for sowing to ensure even growth and a successful harvest.
- Understanding Growth Cycles: Familiarize yourself with the different stages of microgreen growth – from germination to the true leaf stage. Each type of seed has its unique timeline and requirements.
- Harvesting Techniques: Harvest microgreens at the optimal time for the best flavor and nutrition. Use clean, sharp tools to cut the microgreens just above the soil line.
- Troubleshooting Common Issues: Be prepared to tackle challenges such as poor germination, mold growth, and uneven growth. Remember, encountering and overcoming these issues is part of the learning process.
- Storing Seeds: Store your microgreen seeds properly to maintain their viability. Use cool, dry, and dark places for storage and consider using desiccants to control moisture.
Embarking on your microgreen cultivation journey is not just about growing plants – it’s about embracing a lifestyle that values nutrition, sustainability, and the joy of gardening. Microgreens offer a unique opportunity to engage in urban agriculture, regardless of your space constraints or gardening experience.
- Start Small: Begin with a few easy-to-grow varieties and gradually expand your range as you gain confidence and experience.
- Experiment and Learn: Each growing cycle is a learning opportunity. Don’t be discouraged by initial setbacks. Experiment with different seeds, growing mediums, and techniques to find what works best for you.
- Enjoy the Process: Take pleasure in the process of watching your microgreens grow. The satisfaction of harvesting your own fresh, nutrient-packed greens is unparalleled.
- Share Your Journey: Connect with a community of fellow microgreen enthusiasts. Share your experiences, learn from others, and be part of a growing movement of urban gardeners.
Microgreen cultivation is a journey that offers as much in learning as it does in yield. With each seed you sow, you’re taking a step towards a healthier, more sustainable lifestyle. Embrace the process, enjoy the harvest, and let your microgreen journey flourish!


